PowerOffice Integration
Merchants can connect FOODSTED POS with PowerOffice by simply following the steps outlined below to complete the onboarding and securely enable sale data synchronization between the two systems.
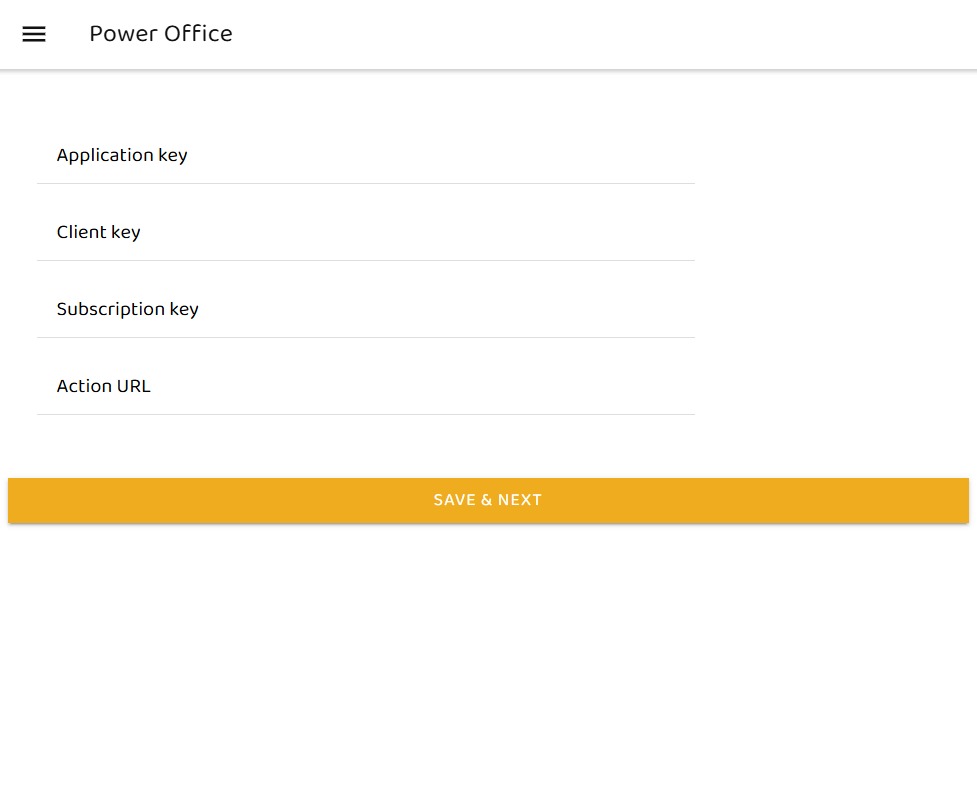
Step #1 → Integration Setup
The user logs in to the FoodSted POS, navigates to Settings → Integrations → PowerOffice, enters all the required fields, and then clicks the Save & Next button to continue.
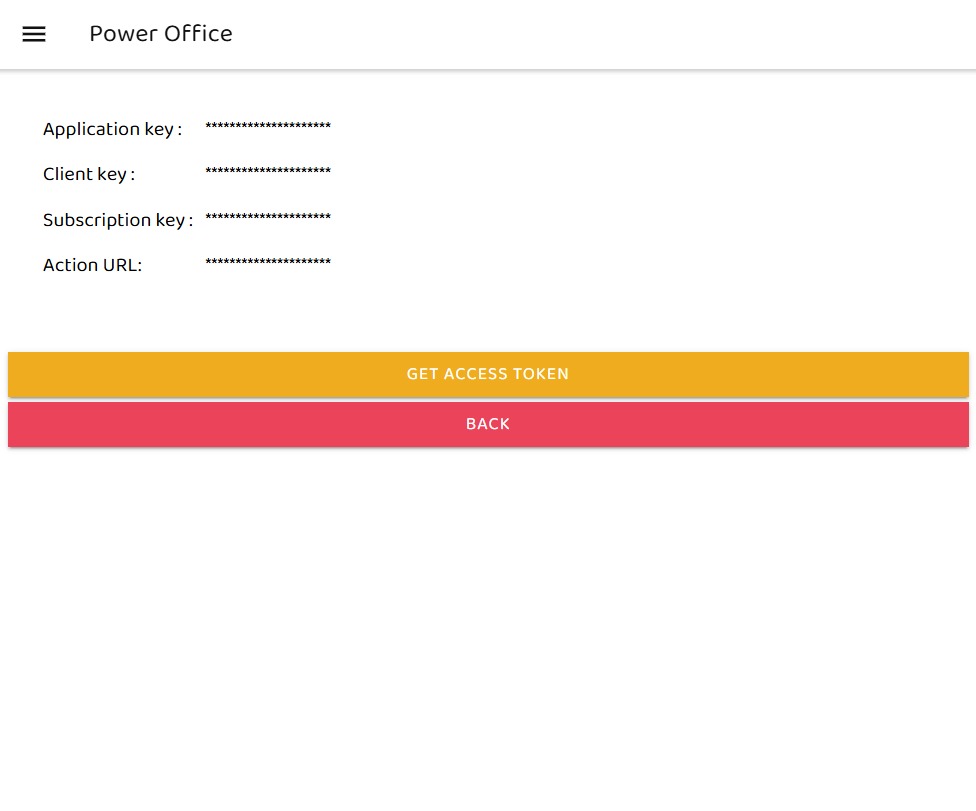
Step #2 → Generate Access Token
In this step, the user clicks the “Get Access Token” button. Once the access token is generated, the user can proceed to the next step of the process.
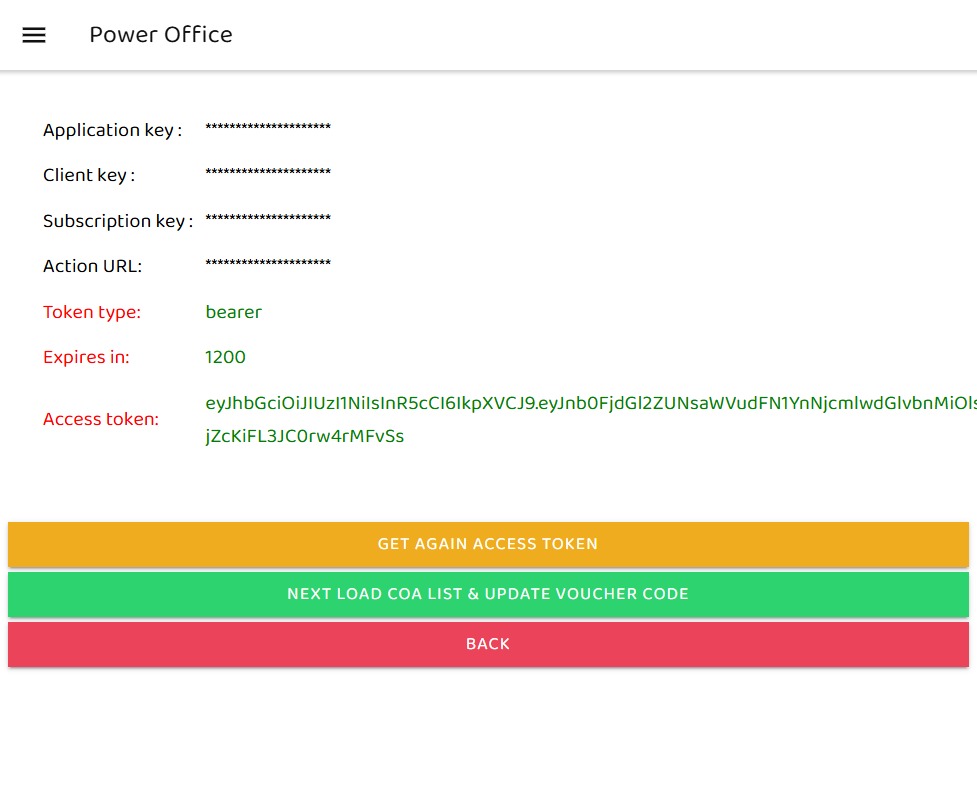
Step #3 → Token Management
In this step, the user receives the access token and can generate a new one by clicking the “Get Access Token Again” or “Refresh Token” button after the expiration time of 1200 seconds. After this, the user clicks the “Next: Load COA List & Update Voucher Code” button to proceed further.
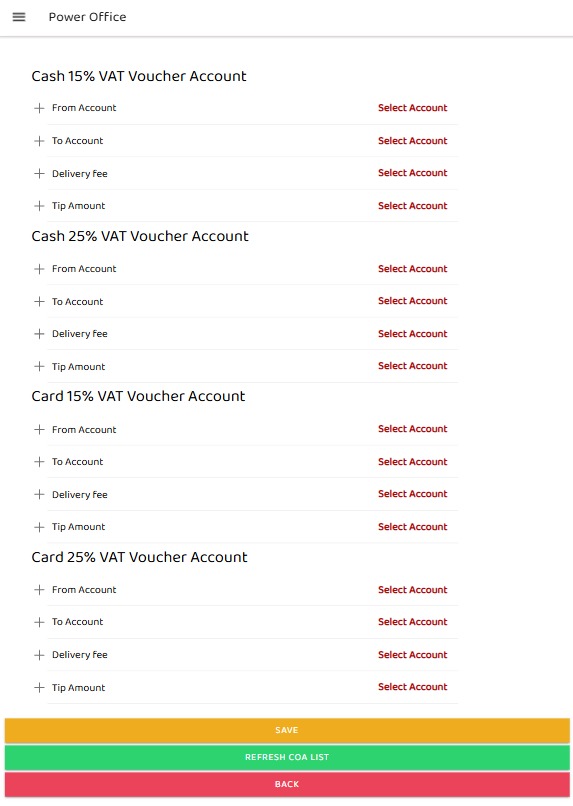
Step #4 → Account Selection
In this step the user will select account
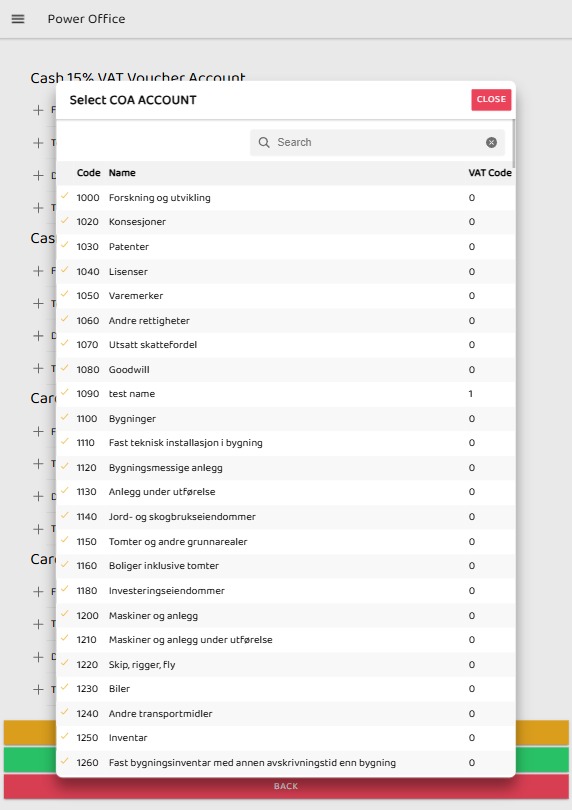
Step #5 → Choose Account
From Step 4, when the user clicks the “Select Account” button, a pop-up will appear allowing the user to choose from the available accounts.
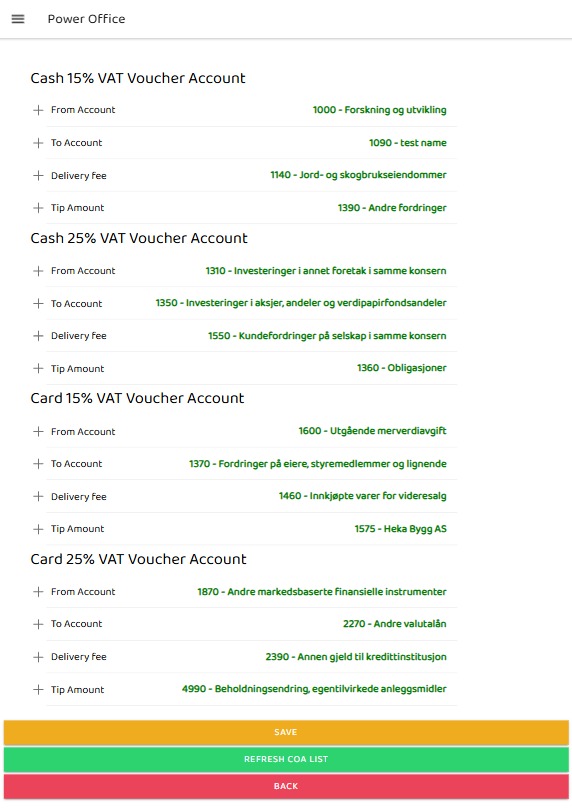
Step #6 → Account Confirmed
After completing Steps 5, the selected account will be displayed as shown below.
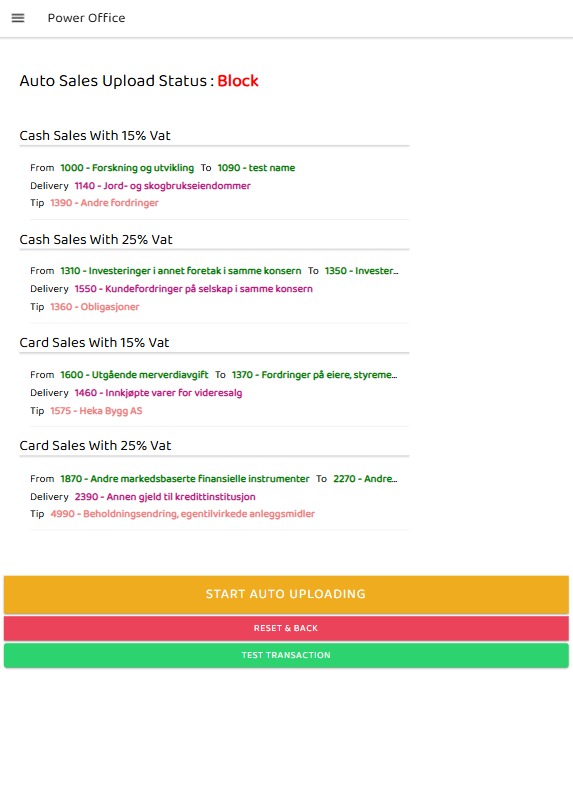
Step #7 → Auto Upload Setup
After clicking Save in Step 6, this view will appear. By default, it will be in a blocked state and will display a Start Auto Uploading button.
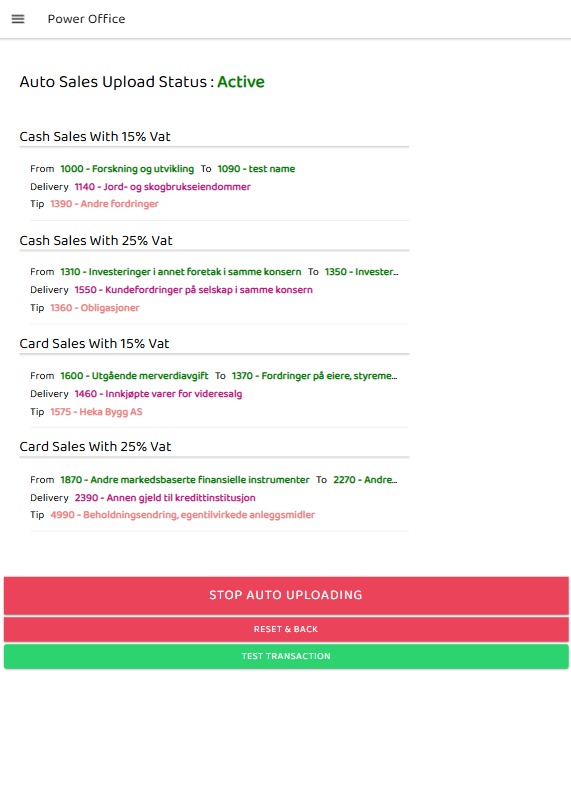
Step #8 → Activate Auto Upload
From Step 7, when the user clicks the Start Auto Uploading button, the status changes from Blocked to Active, as shown below. From here, the user can also stop auto uploading by clicking the same button again.
FOODSTED
© Copyright 2025 All rights reserved